Part One – How to Create a SharePoint Online Intranet

SharePoint has existed in various forms for a long time, and it has evolved and changed a lot over time. In this three-part blog series, I’ll walk you through how to create a modern SharePoint Online intranet.
For those of you already using SharePoint Online, you know that legacy team sites can seem quite basic. For example, there were fewer built-in web components available, such as the News web component. If we add a news web component as a third-party application, it creates more dependency on external vendors. This posed an uncomfortable risk for many customers.
Additionally, it can be difficult to make classic team sites visually appealing with the available native capabilities. The two methods I used to address this challenge were:
- the use of promoted links or SPJS tiles, both of which involve additional time and effort,
- the latter method produces additional dependency on technology not supported by an independent party.
Here’s an example of what a typical SharePoint Online site looks like during initial provisioning.
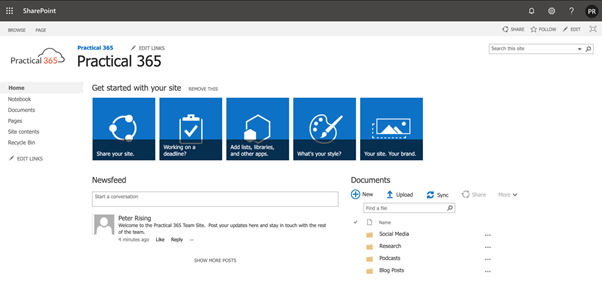
Even when customizing these classic pages, making them look professional using tool bricks will be difficult.
The common solution to this problem was to leverage an “Intranet in a box” solution. This solution could be used in place of SharePoint Online or placed in front of it. Examples of such products are Unily and Valo, both of which are recommended products. However, in my experience, many of my clients were unwilling to absorb the additional cost.
With modern SharePoint Online, it’s much easier to plan and develop using only native features.
The look book
Microsoft even made available the SharePoint Lookbook, which is an amazing resource offering a wide selection of styles. Here are a few:
- Organization
- Department
- Team
- Community
- Solutions
The SharePoint Look Book is shown in the image below:
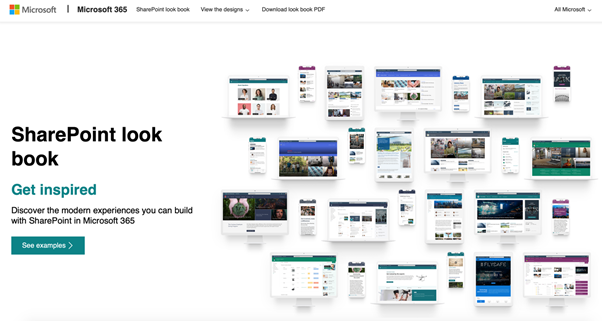
The Look Book helped guide Microsoft 365 customers in creating “stunning intranets.” And it received widespread praise.
While improved, the SharePoint Online experience by no means solves all the problems that existed in the old experience. For example, it is now possible to target information on SharePoint pages to specific groups with the Audience Targeting feature.
However, the Microsoft 365 platform is still relevant and constantly evolving. Therefore, we expect SharePoint Online features to continue to evolve and improve.
The Look Book also offers you the opportunity to select one of the many design templates.
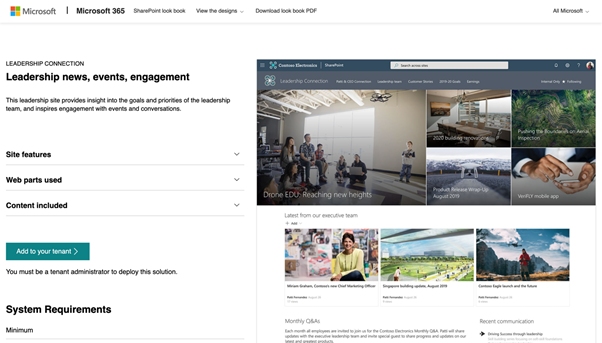
This method makes work easier. And once you’ve added the chosen template to your tenant, you can have an instant intranet page. You can edit and customize it to look like the one below.
Fortunately, creating and building a stylish intranet page isn’t difficult. And in the following steps, I’ll show you how.
Creation plan
First, I’ll walk you through the process of creating a SharePoint Online site. This will become your intranet landing page. This process includes choosing the type of site you’ll need to create. You can choose between team sites, communication sites, and other custom options.
Next, I’ll show you how to change the look of your new site
- by adding your logo, changing the page title
- by applying a custom theme that will include your organization’s branding and colors.
Finally, I’ll show you how to populate and edit your new landing page with relevant content, such as a news feed, quick links, and hero content. You can do this by adding sections and web components to your landing page.
Create your SharePoint Online intranet site
To create your new site, you’ll need to access the SharePoint admin center at https://admin.microsoft.com. You must be either a global administrator or a SharePoint administrator.
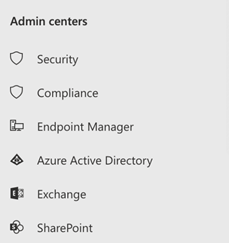
- Once logged in, you will need to navigate to Admin Centers > SharePoint.
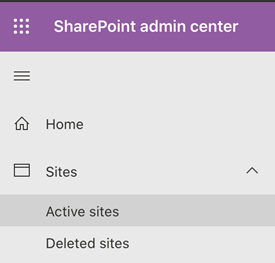
- You will then be taken to the SharePoint admin center, as shown below.
- Click on Active Sites and you will see the list of sites that are already present in your Microsoft 365 tenant.
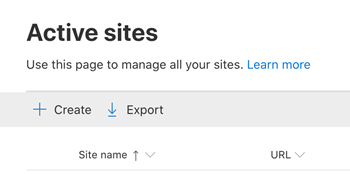
- To create your new site, click Create. You will then have a choice of sites you can create, as shown below:
Let’s take a look at the types of sites available and when to use them.
Types of SharePoint Online intranet sites
The following site types are available in SharePoint Online.
| Team site | A team site is typically used to share documents within a team. When you create a team site, a Microsoft 365 group is automatically created, so this option isn’t ideal for creating an intranet landing page. |
| Communication Site | A communication site is designed to publish content to your organization to keep it informed. Therefore, communication sites are informational compared to collaborative sites, and no Microsoft 365 groups are associated with them when they are created. This is the option we’ll use to configure our intranet home page. |
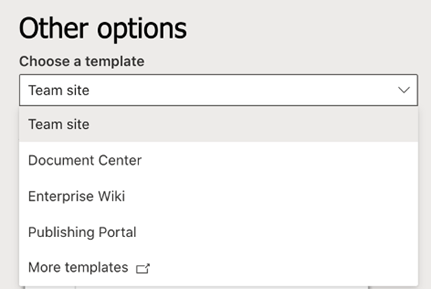
| Other Options | Under Other Options, you can choose from additional templates such as Document Center, Enterprise Wiki, and Publishing Portal. You can choose from other templates, as shown in the image below. These other options will be covered in a future article. |
The choices available in the Other Options selection appear as shown in the following image.
- So, we’re creating an intranet landing page. The primary purpose of such a page is to communicate information to our users. We need to create a communication site. Select the “Communication Site” option on the “Create Site” page, and you’ll see the following options for choosing our site design.
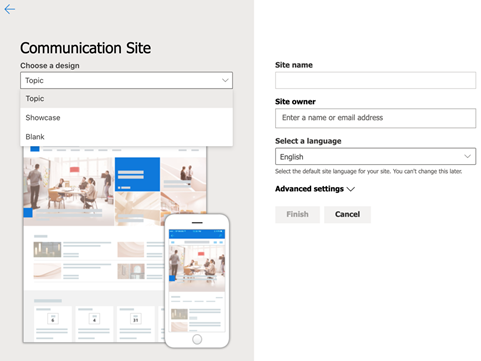
I always choose a blank site to start with, as it gives me the opportunity to customize the homepage. We need to complete the following information to provision our communication site:
- Site name
- Website address
- Site owner
- Preferred language
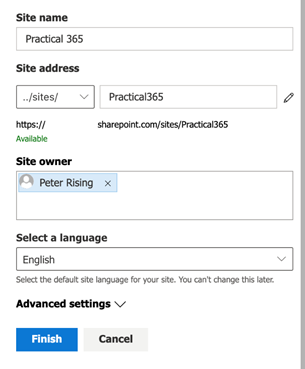
I set mine as shown in the following image.
Advanced options
- Under Advanced Settings, you can also set additional options for the site, including:
- sensitivity,
- the time zone
- the description of the site.
- When you are satisfied with your settings, click Finish.
Read more: Create your own SharePoint document library mass provisioning system using PowerPlatform.
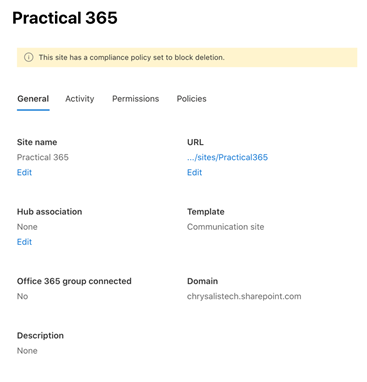
- Your site will be created and appear in the list of active sites in the SharePoint admin center. You can select your new site by clicking on it and then choosing the URL from the General tab, as shown below.
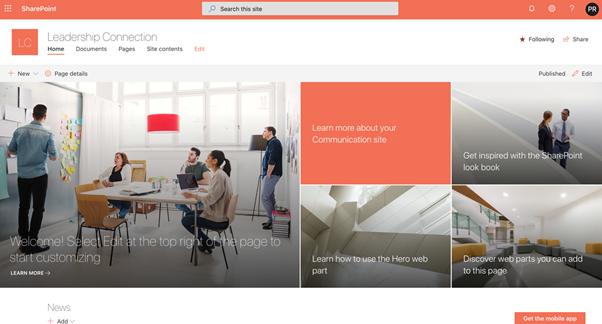
- You should now see a blank Communications site that looks something like this.
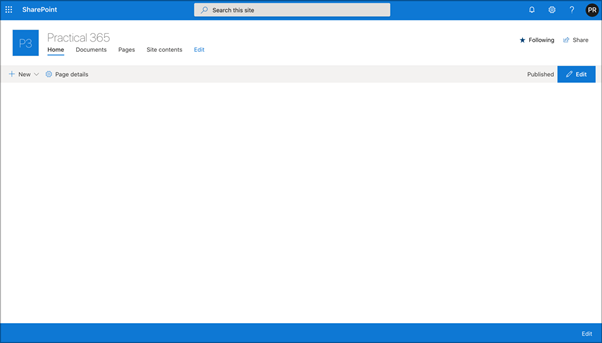
We now have a blank canvas to play with. Next, we want to make some changes to this page to make it look like an intranet landing page that’s right for our brand. Here’s how we’ll do it.
Change the appearance of your site
Now, let’s adjust the appearance of the site by making the following changes:
- Create a Custom Theme Generator
- Apply custom color theme to your site
These steps are my personal recommendations for improving the look and feel of your landing page. You can, of course, find your own preferences. For example, I prefer to remove the footer from all my SharePoint Online pages, but some of you may prefer to leave it in place.
Delete header
To customize our landing page, let’s start by removing the footer.
- To do this, we need to click on the cogwheel located in the upper right corner of the page and select the Change appearance option.
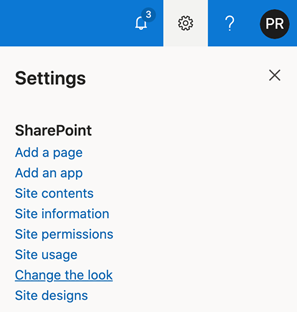
- Select Footer
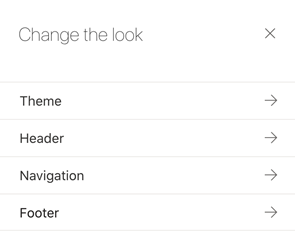
- Set the slider to Off. This will remove the footer from the landing page.
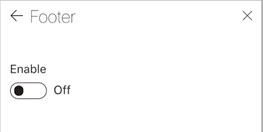
As I mentioned earlier, you don’t have to delete the footer if you want to keep it on your page, but I feel like it gives the page a cleaner look.
Edit the logo
Additionally, from the appearance modification options, we can make changes to our header.
- Click on Header, and from there we can change our homepage logo.
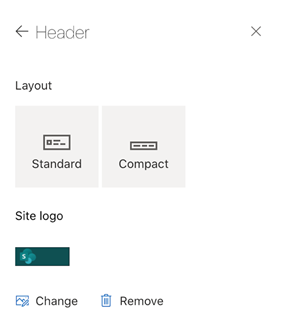
- Click Edit, then upload your chosen image. The new logo will now take effect on your page.
Change the title
Next, we can edit our page title. You’ll notice that the title now reads the same as the logo we just uploaded. Generally, I like to make sure not only that the logo and title read differently, but also that our intranet title is specific and memorable.
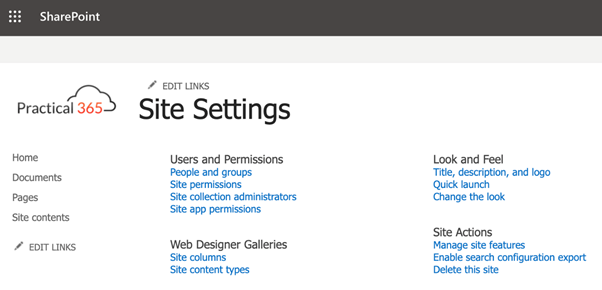
- To change the title, click Site Content > Site Settings, as shown below.

- In the site settings options, choose the title, description and logo in the “Look and Feel” section.
- Here you can edit your title and add an optional description. This page also offers another method for editing the logo. In this example, I’ll change the site title from Practical 365 to HUB 3 6 5. Capital letters and spacing in the site title give a more dramatic and striking feel to the landing page, but this is again a personal preference.
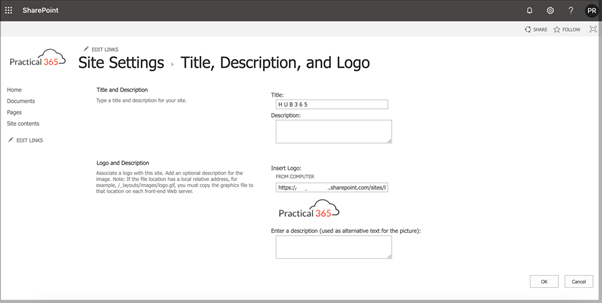
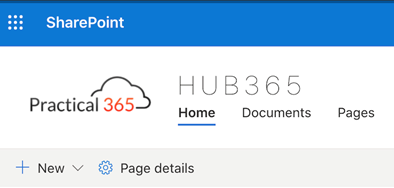
- Click OK when you’re done making changes, and you’ll see your new site title displayed next to your site logo, as shown below.
Conclusion
In this article, we’ve walked you through the steps for creating a new SharePoint Online communication site. This will serve as the landing page for our intranet. We’ve shown:
- How to create the site from the SharePoint admin center
- change some basic settings such as title, description and logo.
In part two of this article series, we’ll show you how to apply custom branding and themes to your page.

