Enable recording during a Teams call or meeting
Who can start or stop a recording?
Anyone meeting the following criteria can start or stop a recording, even if the meeting organizer is not present.
- Has one of the following licenses: Office 365 Enterprise E1, E3, E5, F3, A1, A3, A5, M365 Business, Business Premium or Business Essentials.
- Recording was enabled by an IT administrator.
- Not a guest or from another organization.
| User type | Can you start recording? | Can you stop recording? |
|---|---|---|
| Meeting organizer | Yes | Yes |
| No one in the same organization | Yes | Yes |
| Person from another organization or company | No | No |
| Guest | No | No |
| Anonymous | No | No |
Start recording
When you start recording a meeting, you also enable live transcriptions (if your IT administrator allows transcriptions).
- Start or join the meeting.
- Go to the meeting controls and select More actions
 > Start recording .
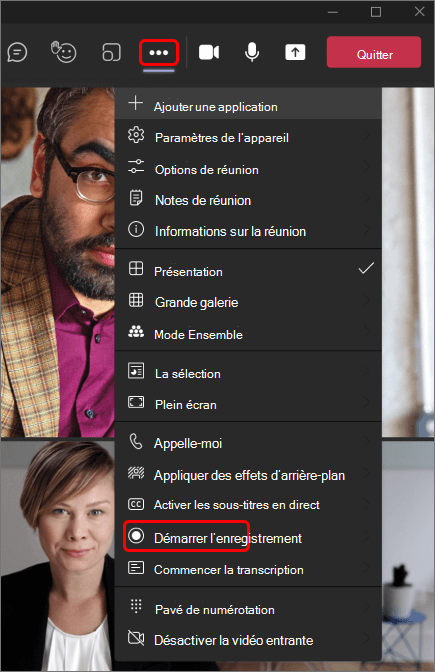
All meeting participants are notified that recording and transcription have begun.

Remarks :
You cannot record multiple meetings at the same time. If someone starts recording a meeting, the recording is stored in the cloud and made available to all participants.
Meeting participants have the option to view the transcript during the meeting. For more information, see Live Transcription.
Stop recording
- Go to the meeting controls and select More actions
 .
. - Choose one of the following options:
- Stop Recording : Stops live recording and transcription.
- Stop Transcription : Stops live transcription only. Recording continues until you select Stop Recording .
Search for recordings
Recordings are available in different locations depending on the type of meeting.
- The recording is processed and saved to SharePoint if it was a channel meeting or OneDrive if it was another type of meeting.
- The meeting recording appears in the meeting or channel conversation (if you are meeting in a channel).
Note: Currently, guests and external participants can only view the recording if it is explicitly shared with them.
Manage the expiration of a meeting recording
Your administrator’s settings determine if (and when) a recording will expire. If your recording has an expiration date, you’ll see a message stating that when the recording appears in the meeting chat after the meeting ends.
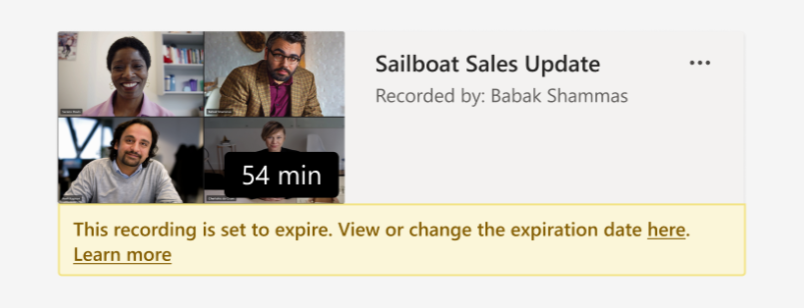
Open the details pane to view or change the expiration date.
There are two ways to achieve this:
- Click on the recording to open it in your browser. Once the browser page opens, select
 in the upper right corner to open the information pane.
 - Or go to My Files in your OneDrive or SharePoint site and view it as a list. Hover over the record in question, select Show actions (the three vertical dots to the right of the file name), and then choose Details .
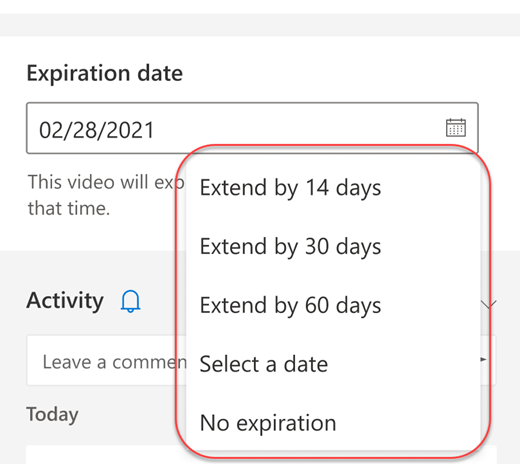
When the information pane is open, look for the expiration date . This is where you’ll see the date that is currently set.

Open the drop-down list to see your date editing options. Extend the recording’s availability for a certain number of days or choose a specific date from the calendar. You can also choose No expiration if you don’t want it to be deleted.
Remarks :
- The message that your recording will expire will remain on the recording in the conversation even if you remove the expiration date. But don’t worry: if you selected No expiration , it won’t expire.
- The recording owner will receive an email when it expires. At that point, they will have up to 90 days to retrieve it from the trash. Once retrieved, the recording will no longer automatically expire.
- Observing the record does not affect the expiration date.
- More information for administrators can be found here .
Confidentiality
When a meeting recording starts, Teams displays a notification to all participants on the Teams desktop, web, and mobile apps, as well as to people who joined by phone.
In some places, you must obtain official permission from each member before you can record them. Make sure you know the rules before you begin.
For more information, see the Microsoft Privacy Statement .
Checking recording rights for a meeting or call
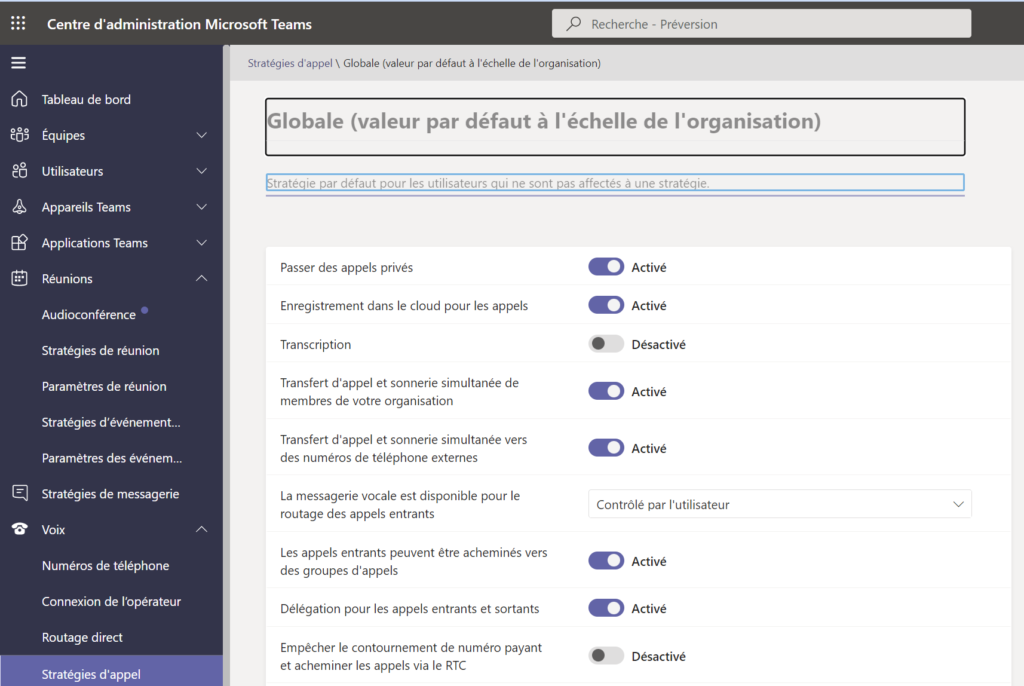
To check the rights, you must go to the temas administrator portal at the following address :
You need to check in the meeting policies that cloud recording is enabled:
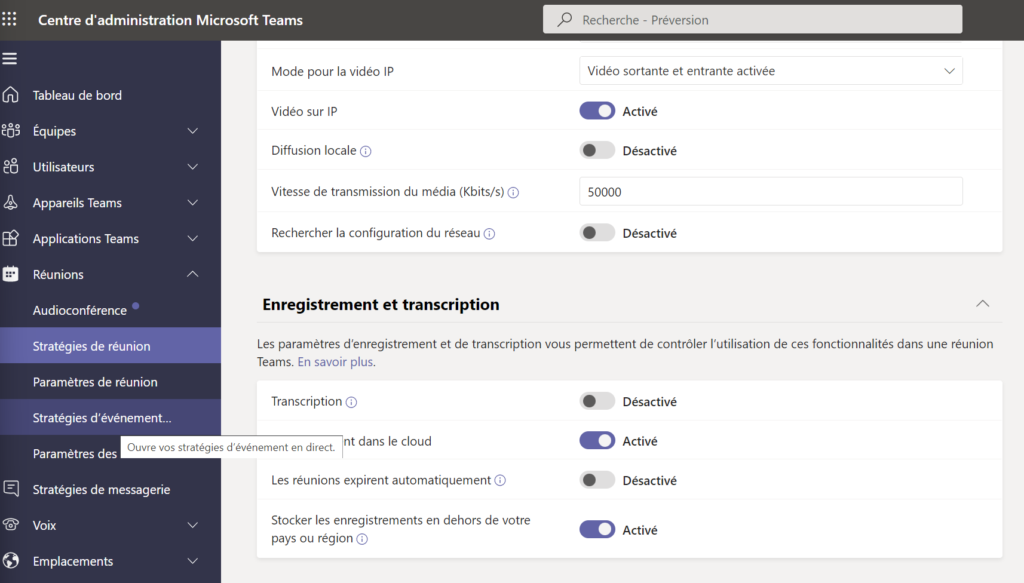
The same goes for call strategies:
