To install Windows 11 on a computer without going through an upgrade process from a previous version of Windows, it is necessary to create a bootable Windows 11 installation USB drive.
A Windows 11 bootable USB drive can also be used to repair Windows 11 or reset and reinstall Windows 11 when it stops working properly or to start from scratch.
Once you’ve created your Windows 11 installation USB drive, you can run the Windows 11 installer inside it either by booting your computer from the USB drive (clean install) or by double-clicking the setup.exe file from File Explorer. By following the installer’s instructions, you can easily install or reinstall Windows 11 on your PC.
In this tutorial, we will see how to create a Windows 11 installation USB drive for free.
1. Create a bootable Windows 11 installation USB drive using the Media Creation Tool
To create a Windows 11 installation USB drive using the Media Creation Tool, follow these instructions:
- Download the Windows 11 Media Creation Tool .
- Insert your USB drive into a USB port on your PC.
- Open the MediaCreationToolW11.exe file .
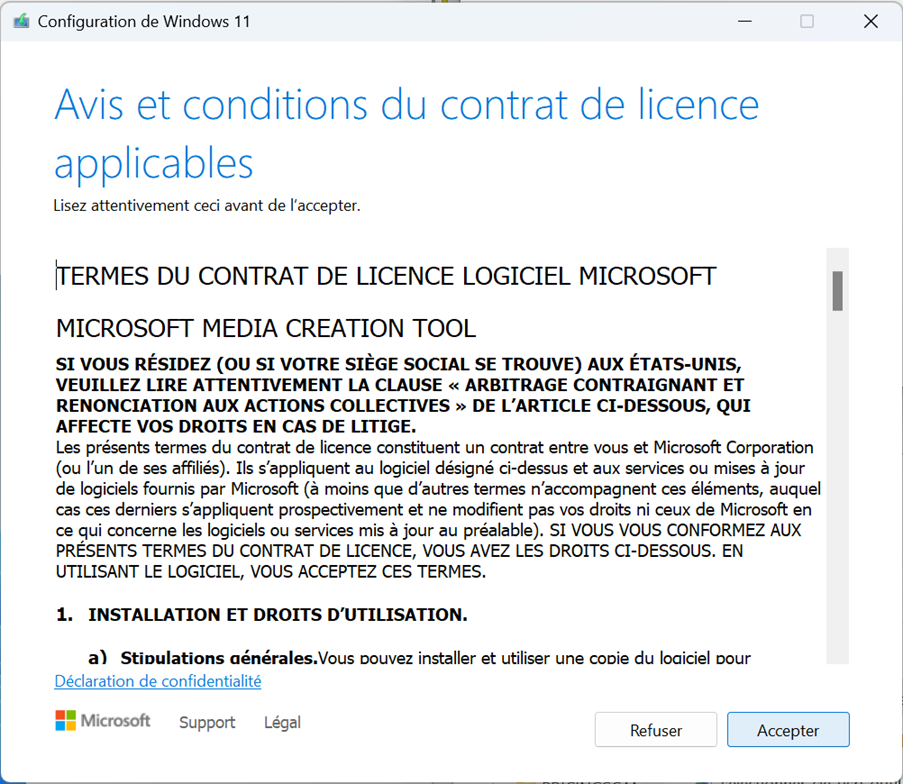
- Click Accept to agree to the terms of the license agreement.
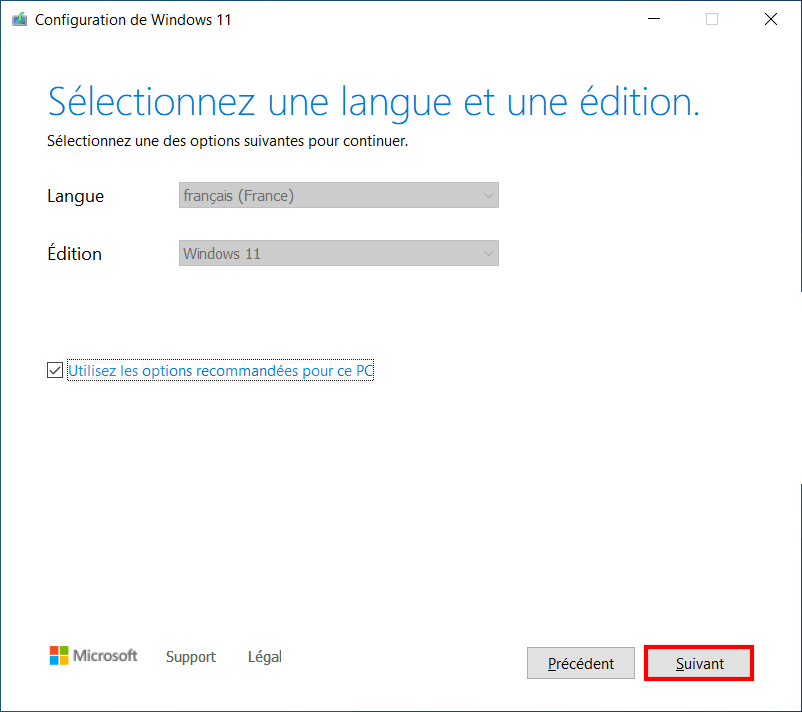
- Leave the recommended options and then click Next .
- Select USB Flash Drive and then click Next .

- Select your USB drive (refer to the drive letter assigned to your USB drive to click Next .

- Please wait while the Windows 11 installation files download.

- Then wait while the Windows 11 installation USB drive is created.

- Once your Windows 11 installation USB drive is created, click Finish .

Congratulations: you have created a Windows 11 installation USB drive using the Media Creation Tool! 👍
2. Create a bootable Windows 11 installation USB drive via Rufus
To create a Windows 11 installation USB drive using Rufus software, follow these instructions:
- Download a Windows 11 ISO .
- Download the Rufus software .
- Insert your USB drive into a USB port on your PC.
- Open the Rufus software by double-clicking the rufus.exe file .

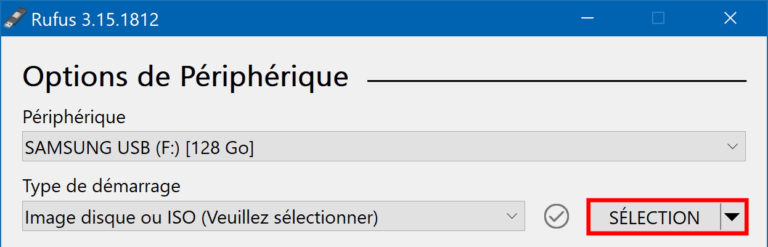
- In Device , select your USB drive (make sure you have selected the correct USB drive).

- Click the SELECT button and then select the Windows 11 .iso file you downloaded earlier.

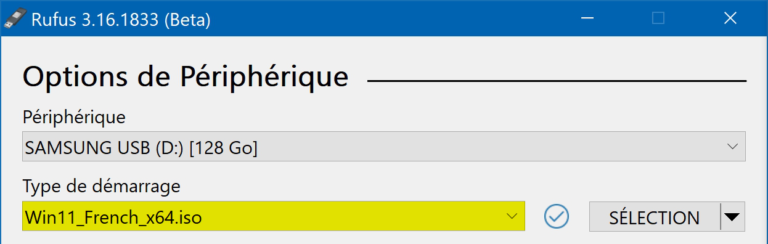
- In Boot type , you should see the Windows 11 ISO.
- Leave the following options at their default values, namely:
- Image Option : Standard Windows Installation
- Partition scheme : GPT
- Destination system : UEFI (non-CSM)
- Volume label : leave the default value
- File system : NTFS

- Click the START button to start creating the Windows 11 installation USB drive.

- Confirm the creation of the Windows 11 installation USB drive by clicking OK .
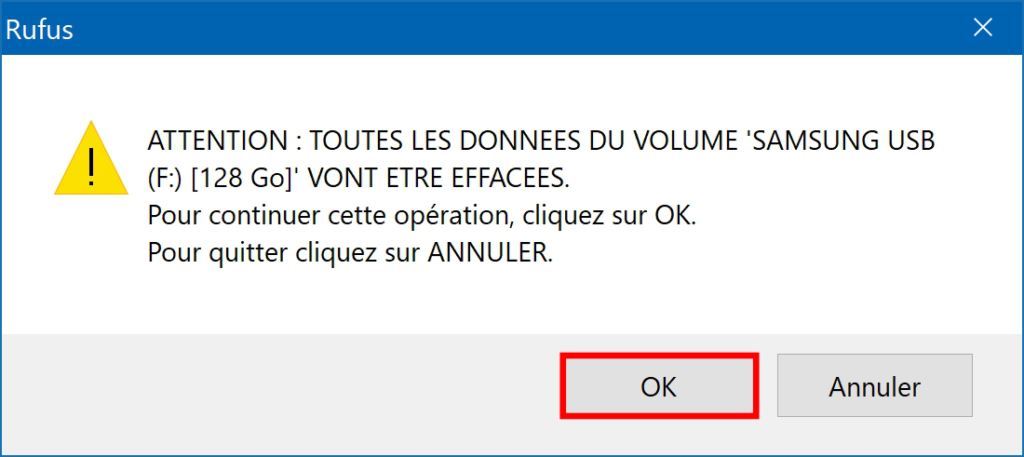
Please note: all data on your USB drive will be deleted.
- Please wait while the Windows 11 bootable installation USB drive is created. This operation may take more or less time depending on the performance of your USB drive and your computer’s USB controller.

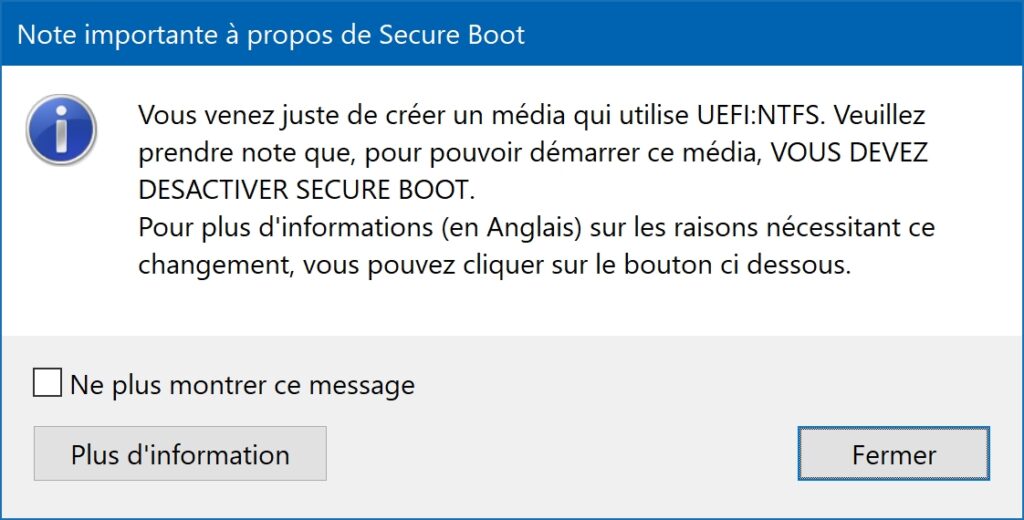
- Close the message about disabling Secure Boot.
- Once the status is READY , it’s done: your Windows 11 installation USB drive is ready!

Congratulations: you have created a Windows 11 installation USB drive using Rufus software! 👍

